Customizing the "Quick Access Toolbar" in Microsoft Visio
Quickly access to Quick Access Toolbar is favourite action in Micorosft Visio. First of all, we have to be similar to Quick Access Toolbar then we will tell you about this handle toolbar in which we add some frequently useable commands like Save, Undo, and Redo. By default, it only contains a few standard options including Save, Undo, and Redo. Yet, it offers many other ways to save time working with your Microsoft Visio document.
By default, Microsoft Visio "Quick Access Toolbar" will find above Microsoft Visio Ribbon in the upper-left corner.

Also, we can place Microsoft Visio "Quick Access Toolbar" below the Microsoft Visio Ribbon in the upper-left corner.

In this article, we will share 3 different ways to customize the Microsoft Visio "Quick Access Toolbar".
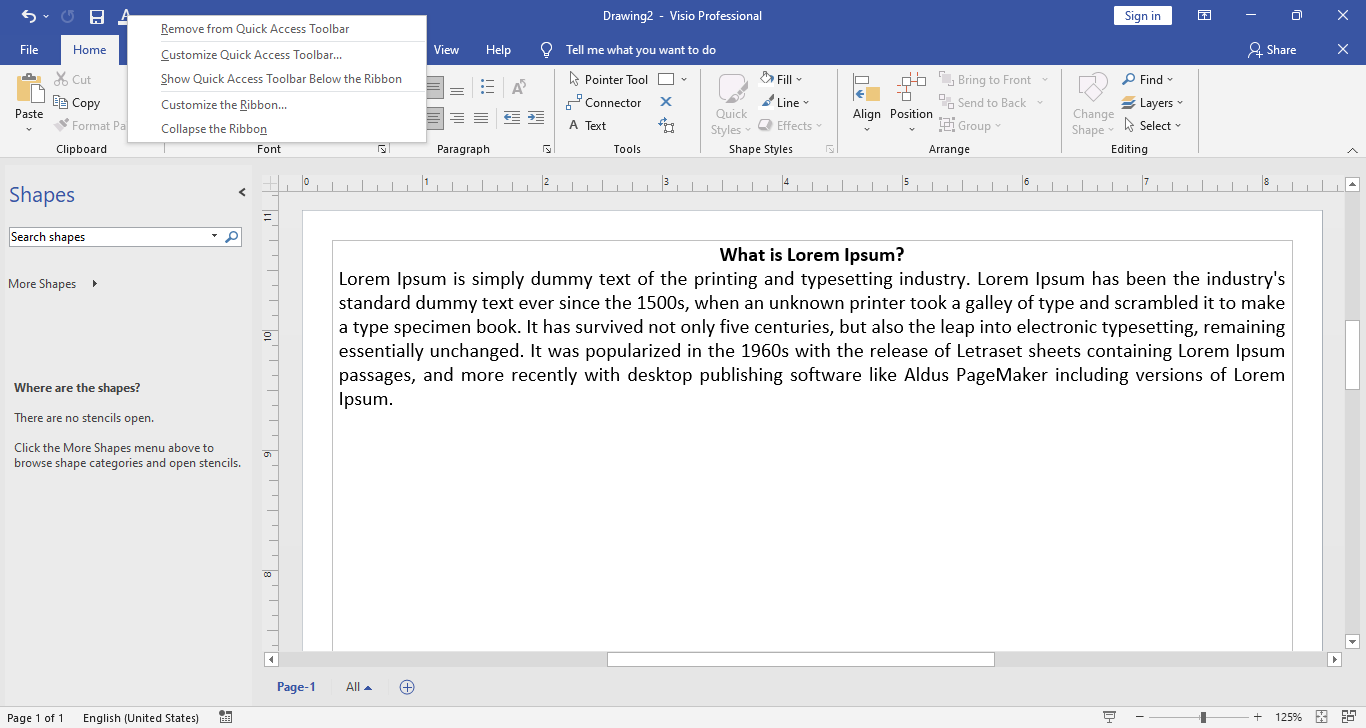
- Adding & Removing Quick Access Toolbar by "Dropdown Menu"
- Managing commands from the Microsoft Visio "Ribbon"
- Lastly, By "File Menu"
1: Dropdown Menu
a. Click on the down arrow to the right of the "Quick Access Toolbar"

2: Ribbon Menu
b. Right-click on the command that we want to include then 3 options menu will be open
- Add Group to Quick Access Toolbar
- Customize the Ribbon
- Collapse the Ribbon

As we are working with "Quick Access Toolbar" then we will select add Group to Quick Access Toolbar. To remove a command from the toolbar, right-click on the icon in the toolbar and select the option, Remove from Quick Access Toolbar.
If we want to remove any tool from "Quick Access Toolbar" then right-click on the tool that we want to remove then a many will be open then "Remove from Quick Access Toolbar"
Note: We can place the Quick Access Toolbar above the Ribbon as below as the below the Ribbon in Microsoft Visio.

2: File Menu
a. Go to the File menu.

b. Go to the options after clicking on the file menu.

After clicking on the Options menu then a "Quick Access Toolbar" will open as we can see.

Comments
Post a Comment
If you require any help related to Microsoft Visio 2019 then let me know. I am available 24/7 to assist you. It's my pleasure to solve your issue.